
Your waistband is done, its facing neatly slip-stitched on the inside, so all that’s left to be done is the buttons and buttonholes that fasten the skirt at the waist! In addition to the basic techniques, I’ll show you a few extra tricks that will help, since both the buttons and their corresponding holes are all on the inside of the skirt.

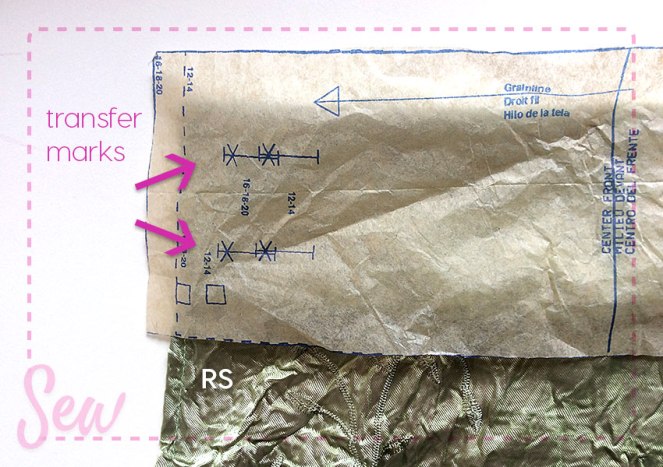
Start with the right side (RS) of the skirt facing you:
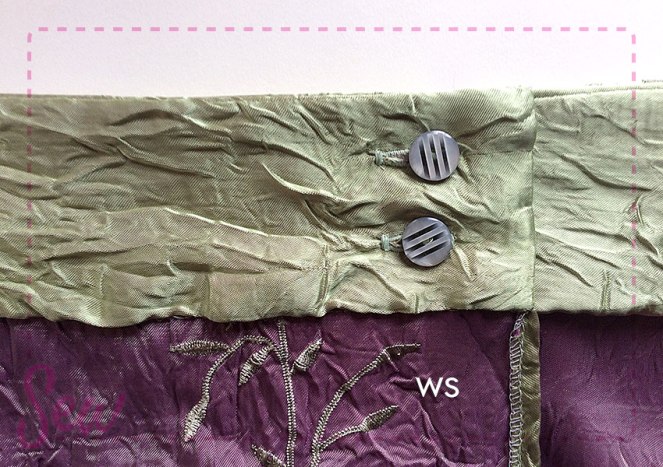
Tip: I think I’ve mentioned this before, but it bears repeating: Make sure the buttons you’re using are as thin and flat as possible (but not flimsy). They’ll be on the inside of the waistband, so any unnecessary thickness could create bumps that will show on the outside, not to mention that this would be uncomfortable to wear. This is a great use for those leftover plain buttons we always seem to have in our stashes!
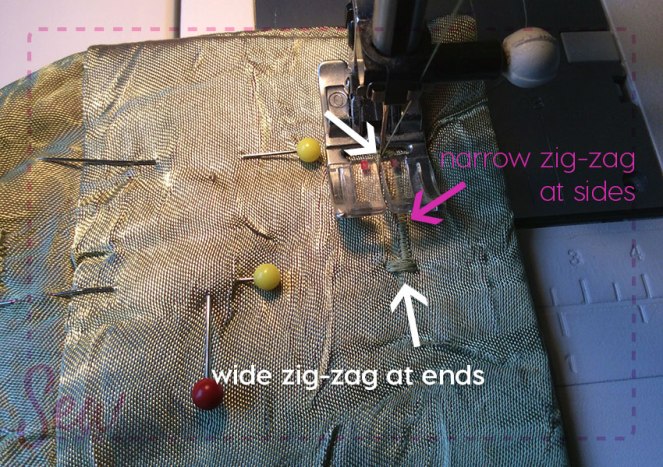
Now I just need to set up my sewing machine. Mine does have an automatic buttonhole function, but I rarely use it, for the simple reason that the largest size it makes is too small for most of the buttons I like to use. So I do buttonholes with a tight zig-zag, and 2 different widths, as follows:
- wide zig-zag (more or less in place) at 1st end;
- narrow zig-zag down right-hand side
- wide zig-zag (again more or less in place) at 2nd end;
- move needle up to 1st end on left-hand side, and narrow zig-zag down left side
- do a few wide zig-zag stitches at 2nd end to finish.
Don’t worry, I’ll show you what I mean!
Aside: I guess I should be used to this by now, but I’m still surprised, when I go to explain a procedure like this, how complex it can seem, when it’s something I do almost without thinking about it! Still, I haven’t forgotten what it’s like to be doing it for the first time— I’ve taught myself everything I know about sewing, so you better believe I’ve learned primarily from making mistakes. Hopefully, you’ll benefit from that! End of aside.
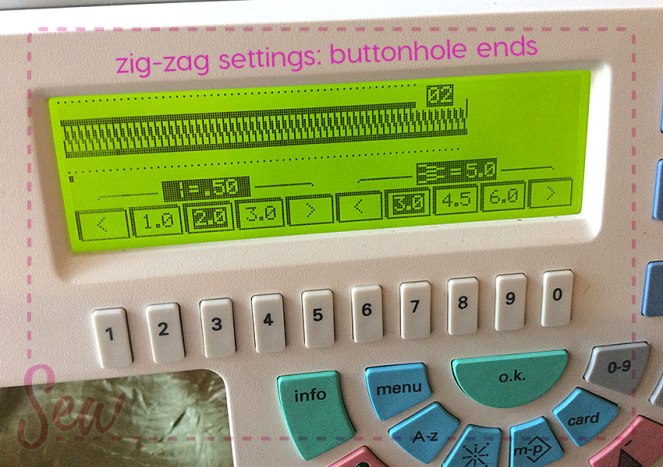

Now change your zig-zag setting to a much narrower one for the buttonhole sides:

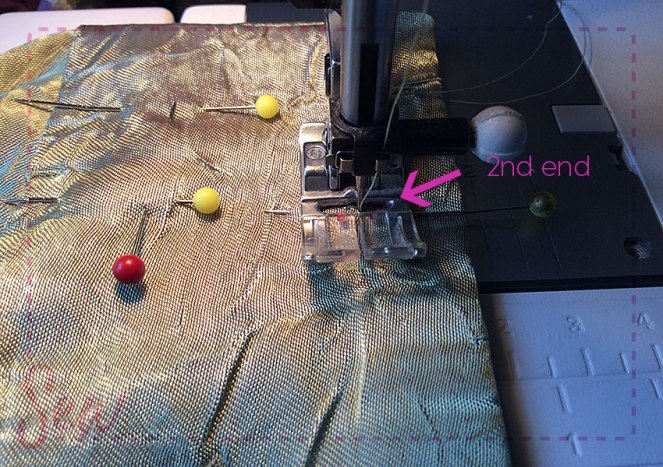
Work the 2nd end as for the 1st, with the wide zig-zag:
Tip: When you move the needle back up to the 1st end, don’t cut the thread— it creates a guideline for you to stitch the 2nd side. Simply zig-zag over that thread as you stitch down that side.
Also, after I’ve stitched the 2nd side, I like to switch back (yet again) to the wide setting, then I make a few extra stitches over the 2nd end; I feel this helps anchor the thread, and reduces the possibility of the thread unraveling on the side.
Here are my buttonholes after stitching both:

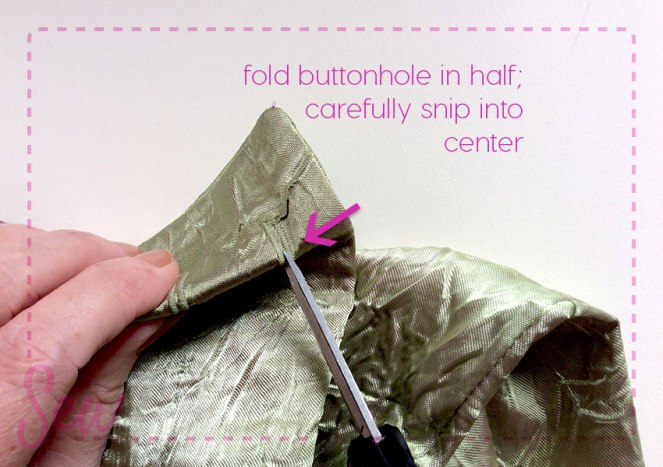
Tip: You can make the narrow-zig-zag side stitches a little wide if you’d like, but keep in mind that you have to cut through the tiny space in between those side— if your stitches are too close together, you’ll cut them along with the fabric. I like to leave some room.
Now I’ll snip through those centers, being very careful not to cut either the side stitches or the wide end stitches:

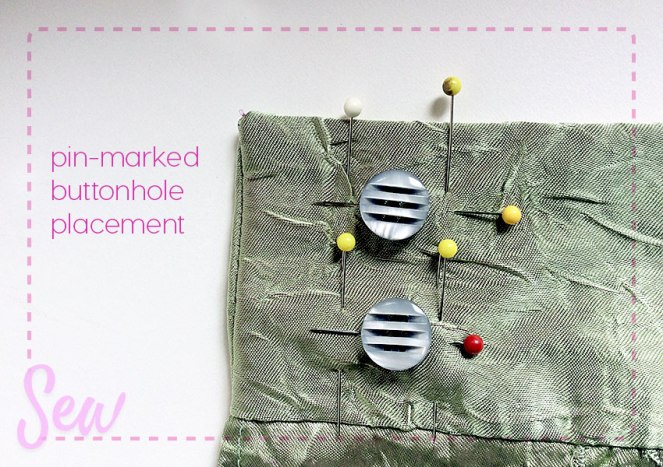
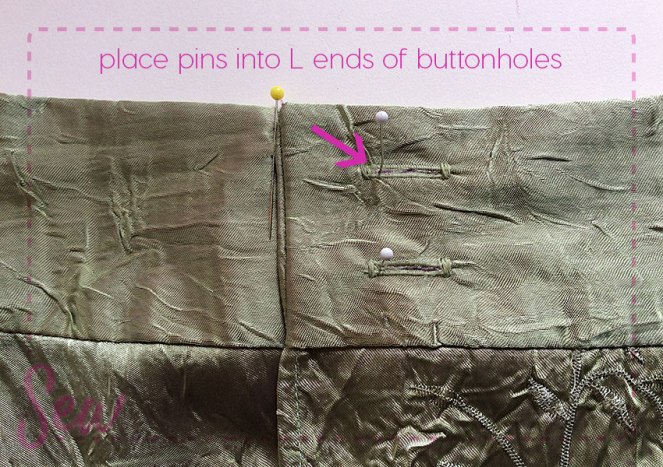
Buttonholes are done! Now I’ll just hand-sew my buttons on. Oh, first I have to mark where the buttons will go, don’t I?

Lay the skirt flat, and bring the buttonhole end back in alignment with the pin you just put in the waistband. Next, stick a pin in the left-side ends of both buttonholes:
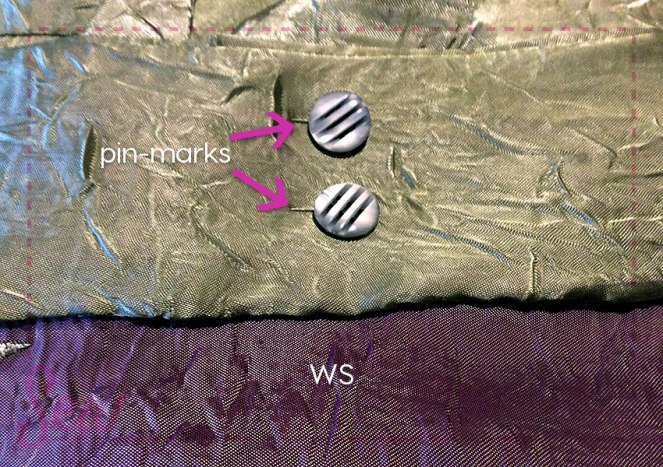
Tip: The only really tricky thing about sewing the buttons on is that you have to keep your stitching from showing on the RS of the waistband— meaning you can’t put your needle all the way through all the waistband layers as you sew. But your buttons still need to be securely anchored. Try to feel when your needle has gone through everything but the outermost layer of fabric.
Note: I’m not including instructions here for hand-sewing on your buttons; there is such a variety available that I’d have to show several different techniques. If you’d like instructions for sewing on your buttons, please comment below with a photo of the buttons, and I’ll be happy to help!
Here’s my finished skirt:

Coming up next: Yes, I know the skirt is finished, but I’ve thought of something else (as I am wont to do). Since these colors are not typical ones in my wardrobe, I’ve been staring at this skirt, trying to figure out what to wear with it— specifically, what colors. So next time, I’m going to show you how to create a color palette, starting with 2 colors, and expanding to a 5-color palette; this will become the starting point for creating ensembles. I’ll base mine on the sage green and deep lavender in my skirt. Should be fun!

Want more sewing stuff from Colormusing? Check out myBratelier (lingerie sewing, including bras!), and Changing Your Clothes, which covers everything from repairs & alterations to dyeing and remaking thrift-shop finds.
And don’t miss all my color-palette-related excitement at the A Musing blog! (Click on the dots above to visit my mother ship, Colormusing.com.)

Nice!.. thank you so much for the detailed lesson. Wish i have a zigzag machine tho.
http://theqeffectz.com
LikeLiked by 1 person
Thanks, Quincy! You bring up an interesting point– do buttonholes have to be zig-zagged? There are bound buttonholes, where no stitching shows on the outside at all, but they’re not appropriate for every type of garment or fabric. I’ll look into this!
LikeLike
Thnks dear
LikeLike